The Flat Cookie Conspiracy: Why Your Chocolate Chip Rounds Are Coming Out as Sad Little Discs
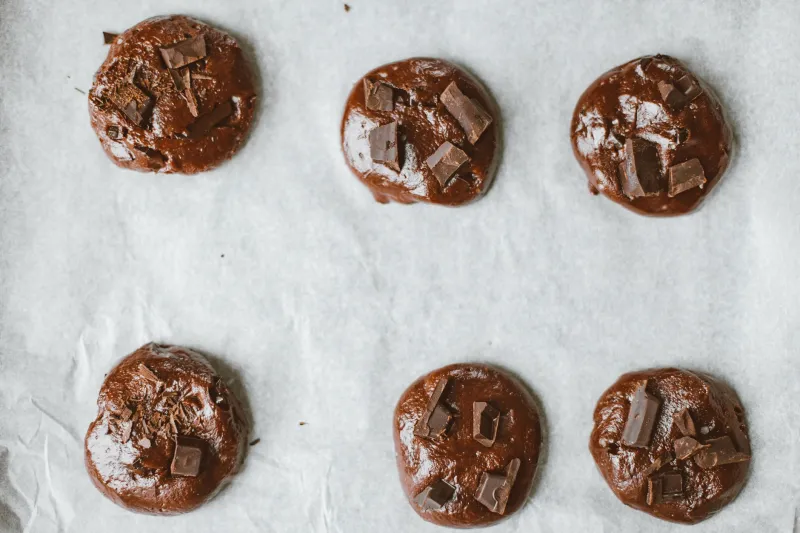
You pull open the oven door with the confidence of someone who has definitely made cookies before. What slides out is not a cookie. It is a thin, lacey, vaguely chocolatey frisbee that has merged with its three neighbors into one continuous sheet of disappointment. You look at your oven. You squint at the temperature dial. You Google 'why are my cookies flat' and immediately land on seventeen articles that tell you to 'try 375 instead of 350.'
Here's the truth nobody is saying out loud: your oven temperature is almost certainly not the problem. The problem is everything that happened before the oven even got involved.
Let's do the autopsy.
Your Butter Was Too Warm and You Know It
This is where most flat cookie disasters begin, and it's the one people are most defensive about. 'Room temperature butter' does not mean butter that has been sitting on your counter since Thursday. It does not mean butter you microwaved for 20 seconds because you forgot to take it out. It means butter that's around 65 to 68 degrees Fahrenheit — cool enough to hold its shape but soft enough to leave an indent when you press it.
When your butter is too warm, it melts during the creaming process instead of trapping air. That air is what gives your cookie structure and lift. No air, no structure. No structure, and you've got a flat disc instead of a thick, chewy round. The fat releases too fast in the oven, the cookie slides outward before it can set, and you end up with that pathetic lace-edged mess you're currently staring at.
If your butter is greasy, shiny, or looks like it's already given up on life, it's too warm. Start over.
Creaming Is a Technique, Not a Vibe
Speaking of butter — how long are you actually creaming it with the sugar? If your answer is 'until it looks mixed,' you're doing it wrong. Proper creaming takes three to five full minutes on medium-high speed. You're not just combining ingredients. You're beating air into fat, which creates tiny pockets that expand in the oven and hold your cookie up off the pan.
Under-cream it and your dough is dense and heavy before it even hits the sheet. Over-cream it (yes, that's also a thing) and you've incorporated so much air that the cookie puffs dramatically and then collapses. The goal is pale, fluffy, and significantly increased in volume — like your butter got a spa day and came back glowing.
Also: don't cream cold butter. Don't cream melted butter. We just covered this. Pay attention.
Brown Sugar Is Doing More Work Than You're Giving It Credit For
The ratio of brown sugar to white sugar in your cookie dough is not a stylistic choice. It's a structural decision. Brown sugar contains molasses, which is hygroscopic — meaning it pulls moisture from the air and holds onto it. More brown sugar equals a chewier, thicker cookie that spreads less. More white sugar equals a crispier, thinner cookie that spreads more.
If you've been casually swapping one for the other based on what's in your pantry, you have found your culprit. Also worth noting: old, hardened brown sugar has lost some of its moisture content, which throws off the whole equation. Fresh, soft brown sugar is what you want. If yours is a brick, either fix it or buy a new bag.
The Baking Soda Situation Is Out of Control
Baking soda helps cookies spread and brown. Too much of it and your cookies go flat and taste vaguely soapy. Too little and they don't spread at all and taste dense. Most recipes are calibrated to the quarter or half teaspoon — that's not a suggestion, that's chemistry.
Also, and this is important: baking soda goes bad. It loses potency over time, and old baking soda means your cookies won't react the way they're supposed to. If your box has been in the back of the cabinet since the Obama administration, it's not doing anything useful. Drop a teaspoon in hot water — if it doesn't bubble aggressively, toss it and buy a new box. They cost a dollar. This is not a financial hardship.
You're Not Chilling the Dough and That's a Choice You're Making
Chilling cookie dough is the step that home bakers skip most often, and it's probably the single biggest lever for controlling spread. When you chill dough, the fat solidifies, the flour fully hydrates, and the flavors develop. When you bake cold dough, the cookie holds its shape longer before the fat melts, which means it sets up taller and thicker before spreading out.
Baking warm, freshly mixed dough is basically handing your cookies a permission slip to go flat. Minimum chill time is 30 minutes. Overnight in the fridge is better. Some bakers go 72 hours and honestly, those people have their lives together in a way the rest of us don't.
If you're in a rush and can't chill the whole batch, at least chill the portioned dough balls on the sheet for 15 minutes before they go in. It's not perfect, but it helps.
Your Pan Might Actually Be Part of the Problem
Okay, fine. The oven isn't to blame — but the pan sometimes is. Dark baking sheets absorb more heat and cause the bottoms of cookies to cook faster, which can contribute to spreading. Thin, warped pans heat unevenly and create hot spots that melt fat before the cookie structure sets. Greased pans give the dough nowhere to grip, so it slides outward.
Use a light-colored, heavy-gauge aluminum sheet pan. Line it with parchment — not a greased pan, not a silicone mat (those can actually increase spread). Parchment. Let pans cool between batches so you're not dropping cold dough onto a hot surface, which starts the melting process before the cookie even sees the oven.
The Fix Is Less Dramatic Than You Want It to Be
There's no secret ingredient. There's no one weird trick. Flat cookies are almost always the result of warm butter, rushed dough, wrong ratios, or an expired leavener — usually some combination of all four. Fix those things and your cookies will be thick, chewy-edged, gooey-centered rounds that look like they came from an actual bakery instead of a cautionary tale.
Check your butter temperature. Cream it properly. Measure your brown sugar and baking soda like it matters (because it does). Chill the dough. Use the right pan.
Your oven has been trying to help you this whole time. Let it.