Homemade Marshmallows That Melt Into Your Mug Are a Technique Problem, Not a Weather Problem
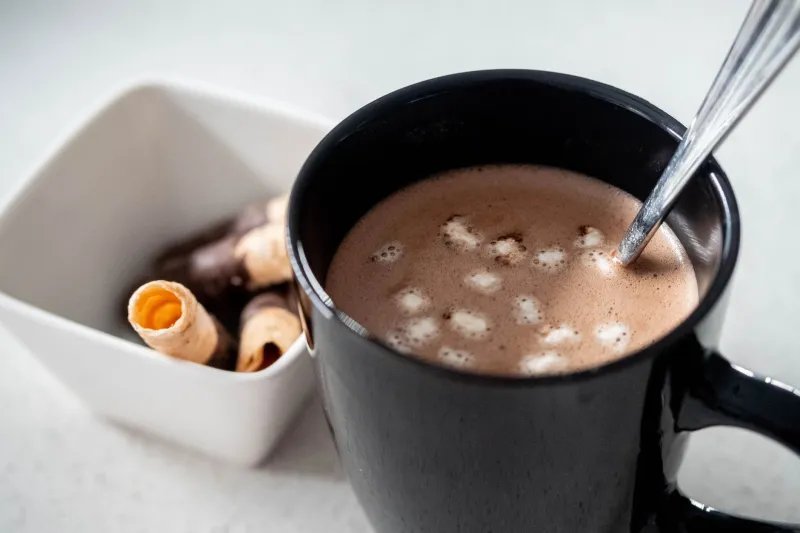
You made homemade marshmallows. You were proud of yourself. You floated a few on top of a mug of hot chocolate, took a photo, posted it somewhere, and then watched in real time as those beautiful little pillows deflated into a thin, weepy film of sugar sadness.
And your first instinct was to blame the weather.
It's humid. It's raining. The kitchen was too warm. The stars weren't aligned. Look, we get it — blaming external forces is a deeply human response to failure. But here's the uncomfortable truth: humidity is a minor supporting character in this tragedy. The actual villain is hiding in your technique, your ratios, and possibly that recipe you found on a blog that hasn't been updated since 2011.
Let's do this properly.
What a Marshmallow Actually Is (Because This Matters More Than You Think)
Before we tear apart your process, let's get on the same page about what we're dealing with. A marshmallow is, at its core, a foam — specifically, a stabilized sugar foam. You're whipping air into a hot sugar syrup and using gelatin to trap that air in a semi-solid structure. That's it. That's the whole trick.
The problem is that foam is inherently unstable. Air bubbles want to escape. Liquid wants to drain downward. Sugar wants to absorb moisture from the atmosphere. Everything about a marshmallow's natural state is working against you from the moment you pull the mixer bowl off the stand.
So when yours weep and deflate, it's not one thing going wrong. It's usually three or four things going wrong simultaneously, all of which compound each other into a hot chocolate catastrophe.
Mistake #1: Your Sugar Syrup Didn't Hit the Right Temperature
This is the one most home bakers get wrong, and it's the root cause of probably sixty percent of weeping marshmallow complaints.
Marshmallow recipes typically call for cooking your sugar syrup to the firm ball stage — somewhere between 244°F and 248°F. That temperature range matters enormously. If you pull the syrup off the heat at 238°F because it looked close enough, you've left too much moisture in the sugar. That moisture has nowhere to go except slowly weeping out of your finished marshmallow over the next few hours.
Get a candy thermometer. Use it. Trust it more than you trust your gut, because your gut is bad at this.
Also worth noting: if you're at high altitude, your boiling point is lower, which means you need to adjust your target temperature downward by roughly 2°F for every 1,000 feet above sea level. Ignoring this is a fast track to sad, sticky marshmallows.
Mistake #2: You Didn't Bloom Your Gelatin Correctly
Gelatin is doing the heavy lifting in this recipe. It's the scaffolding that holds your foam structure together once everything cools down. If your gelatin isn't fully hydrated before it hits that hot syrup, you're going to have an uneven, weak gel matrix — which translates directly to marshmallows that deflate under pressure or weep liquid as they sit.
Blooming gelatin means letting it sit in cold water for at least five minutes before you use it. Not warm water. Cold. Warm water starts to dissolve the gelatin unevenly, and you end up with clumps that never fully incorporate.
Also: don't skimp on gelatin to make a "lighter" marshmallow. Some recipes out there have gotten trendy about reducing gelatin for a more delicate texture. That's a lovely idea that produces marshmallows with the structural integrity of a soap bubble. More gelatin means more stability. Start there.
Mistake #3: You Whipped It Wrong
Here's where it gets a little counterintuitive. Most people assume that more whipping equals fluffier, better marshmallows. And to a point, that's true — you need to whip enough air in to get that classic light texture. But there's a ceiling, and blowing past it creates problems.
Overwhipped marshmallow mixture starts to lose its glossy, elastic quality and becomes grainy and dry-looking. When that happens, the foam structure is actually starting to break down. Those marshmallows will look fine in the pan but will weep and shrink faster than properly whipped ones.
The target texture is thick, glossy, and ribbon-like. When you lift the whisk, the mixture should fall in slow, heavy ribbons and hold its shape briefly before melting back in. If it looks like stiff meringue peaks, you've gone too far.
Mistake #4: The Cornstarch and Powdered Sugar Coating Is Doing Nothing
Every marshmallow recipe tells you to dust your finished marshmallows in a mixture of cornstarch and powdered sugar, and you've been doing it. But here's the thing — that coating is primarily there to prevent sticking, not to protect against weeping. If your marshmallow is already structurally compromised from any of the mistakes above, a cornstarch dusting is just decorating the problem.
What the coating can do is help manage minor surface moisture. Make sure your ratio is roughly half cornstarch, half powdered sugar. All powdered sugar will just add more hygroscopic material that pulls moisture in. All cornstarch tastes chalky and weird. Half and half is the move.
The Storage Situation (Yes, This Part Actually Does Matter)
Okay, fine — environment isn't completely off the hook. Once your marshmallows are made correctly, storing them improperly can still cause problems.
Do not refrigerate homemade marshmallows. The fridge is a humid environment and the temperature change when you take them out causes condensation on the surface, which kicks off a weeping cycle. Store them at room temperature in an airtight container with extra cornstarch-powdered sugar mixture lining the bottom and sides. They'll keep for two to three weeks without drama.
Also: don't cut them directly before serving if you can help it. Cut surfaces are exposed gelatin matrix, and those edges will start to weep faster than coated surfaces. Cut them close to when you need them.
The Formula That Actually Holds Up
Here's a quick framework that addresses all of the above:
- Gelatin: Use three packets (about 21g) for a standard 9x13 pan batch. Don't reduce it.
- Bloom: Cold water, five full minutes, no shortcuts.
- Syrup temp: Hit 246°F minimum. Use a thermometer.
- Whip time: Whip on high for 10-12 minutes until thick and glossy — not stiff and dry.
- Set time: Give them a full 8 hours at room temperature before cutting. Overnight is better.
- Storage: Room temp, airtight, extra dusting inside the container.
Follow that framework and you will have marshmallows that float on your hot chocolate without immediately dissolving into a thin sugar ghost.
The Honest Takeaway
Store-bought marshmallows hold up so well because they're made with corn syrup ratios and stabilizers that are engineered specifically for shelf stability and moisture resistance. You're not going to fully replicate that at home, and that's fine — homemade marshmallows have a flavor and texture that the Jet-Puffed bag genuinely cannot touch.
But you have to earn that outcome. You have to hit the right temperature, respect the gelatin, stop overwhipping, and store them like you mean it. Do those things, and your hot chocolate situation is going to look very different.
Your marshmallows don't have to lose to a plastic bag. They just need a little more respect for the science involved.