Your Sourdough Starter Smells Like a Locker Room — Here's What You Did Wrong
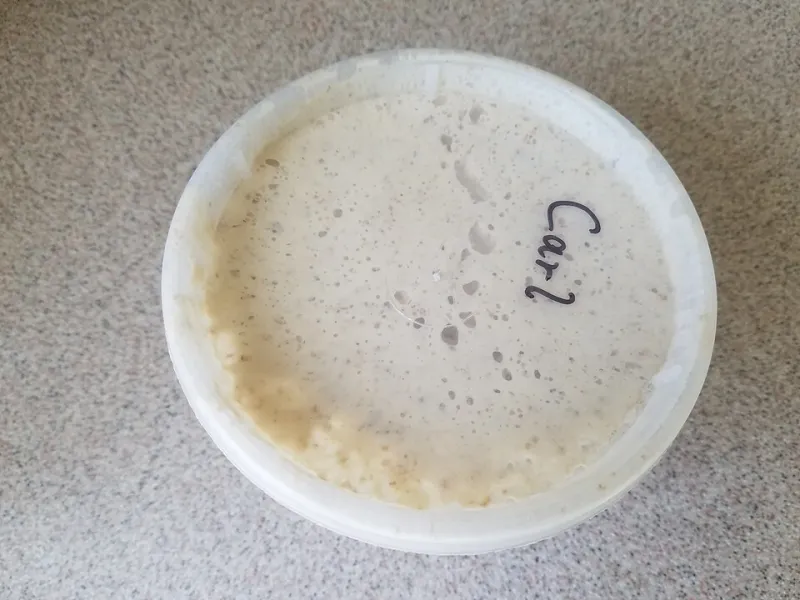
Photo: Anon423, CC BY-SA 4.0, via Wikimedia Commons
Let's be honest. You watched a YouTube video, got inspired, mixed some flour and water together, left it on your counter, and expected magic. Instead, you got a bubbling jar of something that smells vaguely like old sneakers and regret. Welcome to sourdough, baby.
Here's the thing — a funky starter isn't a death sentence. It's a cry for help. Your little wild yeast colony is basically a pet, and right now it's a neglected, confused, slightly feral one. But unlike your college roommate's gym bag, this situation is completely salvageable. Let's dig into what's actually going wrong.
The Gym Sock Problem Is Real (And It Has a Name)
That sharp, acrid, almost acetone-like smell? That's not sourdough flavor. That's hooch — a thin layer of liquid that forms when your starter is starving. It's basically alcohol produced by stressed-out yeast and bacteria screaming at you to feed them. Some people mistake this for normal fermentation. It is not. It means your starter has burned through its food supply and is now eating itself.
The fix is simple: pour off most of it, discard a big chunk of your starter, and feed it fresh flour and water. Don't be precious about discarding — it feels wasteful, but keeping a massive jar of half-dead starter is just making the problem worse.
You're Probably Keeping It Too Warm (Or Too Cold)
Temperature is everything in sourdough fermentation, and most people get this completely wrong in one direction or the other. Here's the real talk:
Too warm (above 85°F): Your starter goes absolutely feral. The bacteria responsible for producing lactic acid (the good, milky, pleasant sourness) get outcompeted by acetic acid bacteria, which produce a sharp, vinegary, almost nail-polish-remover flavor. Your kitchen in July with no AC is basically a bacteria cage match, and the wrong team is winning.
Too cold (below 65°F): Fermentation slows to a crawl. Your starter looks sad, barely bubbles, and when it does finally produce something, the flavor profile is flat and weird — kind of like bread-flavored nothing.
The sweet spot is 70–78°F. If your kitchen runs cold, try putting your starter on top of the refrigerator (it's warmer up there), or near a warm appliance. If it runs hot, find a cooler spot or even use your microwave with just the light on as a proofing chamber.
Your Feeding Ratio Is Off and Your Starter Knows It
A lot of beginners feed their starter like they're feeding a goldfish — a little pinch here, a little sprinkle there. That's not how this works. Feeding ratios matter enormously, and ignoring them is how you end up with an imbalanced microbial ecosystem that tastes like punishment.
The standard starting point is a 1:1:1 ratio — one part starter, one part flour, one part water by weight. But if your starter is really struggling, a 1:5:5 ratio (one part starter to five parts each of flour and water) gives the yeast and bacteria more food to work through and encourages a healthier, more balanced fermentation.
Stop measuring by volume with random spoons. Get a kitchen scale. Seriously. This is the single best $15 investment you can make for your sourdough journey.
The Flour You're Using Might Be the Villain
All-purpose flour from a big box store that's been sitting in your pantry for two years? Hard pass. Sourdough starters thrive on whole grain flours — whole wheat, rye, spelt — because the bran and germ contain more wild yeast and nutrients. Even swapping out just 20% of your white flour for whole wheat during feedings can dramatically improve activity and flavor.
Rye flour in particular is like rocket fuel for a sluggish starter. If yours is barely bubbling and smells off, try a few feedings with a small rye addition and watch the thing come back to life like a plant that finally got watered.
Your Timing Is Completely Wrong
Here's a mistake that almost every new sourdough baker makes: they feed their starter on a schedule based on the clock, not based on what the starter is actually doing. Feeding every 24 hours sounds logical and organized. It is also often completely wrong.
You should be feeding your starter when it hits peak activity — that moment when it's fully risen, domed at the top, and starting to show signs that it's about to collapse. That window tells you the yeast have done their job and are ready for more food. Depending on temperature and ratio, that could be 4 hours or 12 hours. The clock doesn't matter. The starter does.
Learn to read it. Float test (drop a small spoonful in water — if it floats, it's active), dome shape, and the smell (should be pleasantly tangy and yeasty, like beer and yogurt had a baby) are your real indicators.
Hydration: It's Not One-Size-Fits-All
A 100% hydration starter (equal weights flour and water) is the most common recommendation, and it works great for most people. But if your kitchen is particularly warm and humid, a stiffer starter (around 60–70% hydration) can actually slow fermentation down just enough to develop more complex, balanced flavors instead of racing straight to over-fermented nastiness.
Conversely, in a dry, cool environment, a slightly more liquid starter can stay active longer between feedings. Play with it. This isn't chemistry class with one right answer — it's cooking, and your environment is part of the recipe.
The Honest Bottom Line
Your starter smells like a gym locker because it's stressed, neglected, too hot, too cold, underfed, overfed, or made with flour that's been sitting next to your spice rack since the Obama administration. None of these are catastrophic failures. All of them are fixable.
Be consistent. Use a scale. Pay attention to temperature. Feed based on activity, not the clock. And for the love of all things crusty and delicious, use fresh flour.
Give it two weeks of disciplined, attentive care and your starter will go from locker room to legitimately something you brag about at brunch. And then you can pretend you knew what you were doing all along.